Installing a new carpet provides a fresh look to your room. It gives a soft feel underfoot, better sound control, and improves interior insulation. If you are curious, how is carpet installed? So, this blog by top-rated carpeting company is for you.
With the right tools and techniques, you can effortlessly install carpet yourself and save a lot of money. It can be a satisfying task. This blog will walk you through everything you must do at each step. From removing the old carpet to installing the tack strips, padding, and new carpet, here is the proper guide.
What Pre-Preparations Are Required Before Installing Carpet?
The first prep is to get the accurate measurement of the total square foot of the area and the perimeter. This will give an idea of how much carpet you need for your space.
Carpet is usually sold in rolls, often with widths of 12, 13, or 15 feet. The excess carpet left on a particular roll determines its length, and it can be cut to any size.
Around the perimeter of the room, if you see a quarter-round trim then you are required to remove it. This way, the edges of the carpet can easily meet the wall of the room.
-
Choose The Right Colour And Density For Carpet
A carpet comes in different densities, textures, and colours. So you need to be sure about the colour and texture you need. Also, identify the density you require for the carpet.
A densified carpet with design in detail will come in high price, and less densified in low price. One’s personal preferences and budget play a key role in this regard.
When selecting the carpet’s color, consider your wall color first and choose a contrasting color. For instance, if your wall color is vibrant or dark, then a light or neutral color, such as gray or shades of white, will look perfect on the floor. If the wall color is light, consider a darker and richer color for your carpet.
-
Select Good Quality Carpet And Padding
There are different levels of quality in padding and carpets. Make sure that you select dense and waterproof padding. The casual mistake we make while selecting padding is that we look at its thickness, which is not a symbol of its quality. Instead, one should look at its density.
When you are checking the carpet, fold the sample outwards. If you find the carpet’s backing visible, then it is a lower-quality carpet.
-
Collect Right Material
Before starting the procedure it is important to ensure that you have the right tools in your hand. These tools are as follows:
- Carpet Knife
- Knee Kicker
- Carpet Stretcher
- Utility Knife
- Seaming Iron
- Stair Chisel
- Staple Gun
- Seam Roller
Look How Is Carpet Installed: Step-By-Step Guide
Once your surface is prepped, You are ready to start. The following steps are involved in the installation of a carpet.
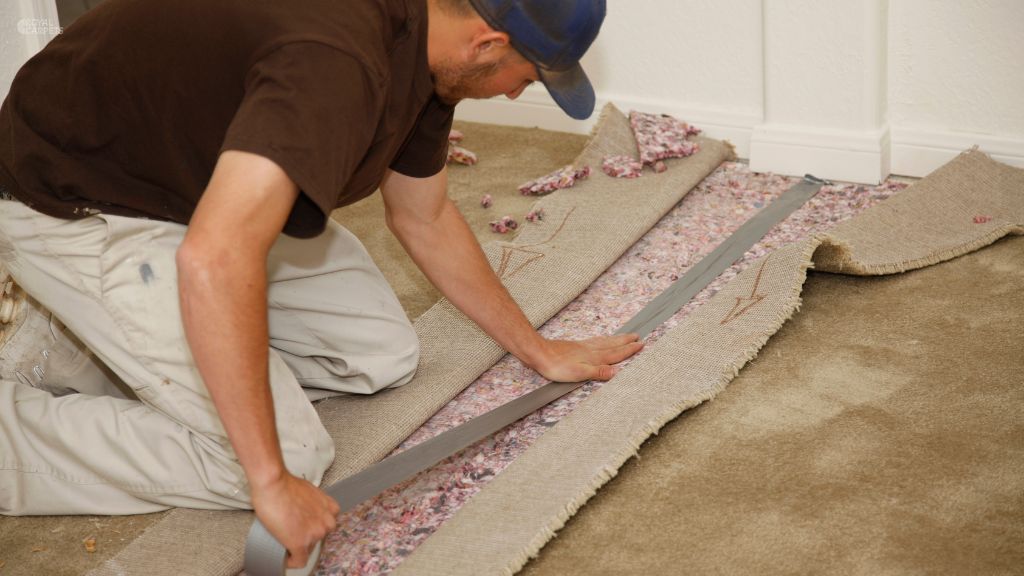
Step 1. Clean The Area
If the room already has carpet, remove it and the padding. Smooth and clean the subfloor, and remove any staples, paints, or residual glue. After removing all of them, vacuum the floor.
Step 2. Add Tackless Strips
The second step is to cut the tackless strips in the proper size for installation using a strip cutter. Now, nail the strips one-half inch away from the area of the wall. An end-to-end installation of tack strips is then required. Avoid installing tackless strips across room thresholds and doorways due to their sharpness.
Step 3. Insert The Carpet Padding
This step is important because when you install carpet padding, it adds insulation to the space and decreases room noise. Now, decide on the direction for the new carpet whether its sisal, stairs, or persian carpet and unroll the carpet pad. Ensure that it is lying perpendicular to the direction of the carpet.
Now it’s time to staple the padding down close to tackless strips, with the help of a staple hammer. Stretch out the padding to confirm whether the sections are snuggled tightly together.
Step 4. Trim The Corners
Once you have installed the carpet padding, the next step is to mark the corners to trim. First, measure the longest part of the room and increase it by 3 inches. If there is an exterior space, move the carpet outside. The carpet may be red carpet or exhibition carpet and mark the back of the carpet for trimming.
To mark from one line to another, you can use chalk. Following the chalk line, trim any carpet like wall to wall carpet and round carpet across the back. Once it is trimmed, shift it back inside for installation. Now unroll the carpet and straightly line it up in the room. Trim any excess and roll out any additional carpet.
Related to this: How to Install Stair Carpets?
Step 5. Create Seams: Get Glue
In this step, you need to create seams along the meeting points of the carpet edges. Check each carpet edge twice to ensure it is straight.
Now, put a piece of seaming tape, sticky side facing up, below the carpet’s seam. Set the seaming iron on the tape for fifteen to thirty seconds. Move the iron slowly across the tape and press the carpet seam as soft glue forms. Until the glue dries, put something heavy on the top of the seam to keep them in place.
Step 6. Attach The Carpet
Now, we have reached the final step. Choose one side of the room and connect the carpet’s edge to the strips using a knee kicker which helps in stretching the carpet with strips. Use a power stretcher to connect the rest of the carpet strips and trim the excess carpet. Now, your room is ready to be filled with furniture.
Final Words
That was all the discussion about how is carpet installed. Installing carpets or high-quality flooring is not a difficult task until you choose the right tools and techniques. Trust the process and follow the guide carefully. Besides all that, always make sure to buy the carpets from a trusted carpet supplier for matchless quality. Good luck with your new carpet!