Do you want to make your home or residential places inviting? Then, you can do it by simply replacing its floor covers. People love installing carpet tile in their homes and offices instead of full-coverage wall covering. These carpet squares are available in multiple designs, colors, patterns, and styles to complement every interior style. Besides all that, they are very easy to install and do not require professional help.
If you are also planning to install carpet tiles by yourself, then you must be searching for how to install carpet tiles. But there is no need to search anymore, as this blog by royalcarpets.ae will explain the best way to install carpet tiles with minimal effort.
5 Steps Guide On How To Install Carpet Tiles
Installing the carpet square is not a complicated task. Instead, it can be a fun and creative activity for you, but only if you know how to do it correctly. So, let’s have a look at the steps that you need to follow while installing the carpet tiles.
1. Put together all the Tools and Materials
If you want to make the installation process fun and tension-free, then it is crucial to put all the materials and tools in one place. Below is the list of the tools and materials that you will need.
- High-quality carpet tiles
- Measuring tape or ruler
- Straight edge or chalk line
- Carpet roller
- Utility Knife
- Non-toxic adhesive
- T-square or the Ruler
- Vacuum Cleaner
Pro Tip
Always choose the best Carpet Tiles Shop for buying modular carpets. Such shops offer products that can last for years at very affordable prices.
2. Prepare The Floors Carefully
The second step is to prepare the floor properly to ensure flawless modular carpet installation. Vacuum your existing floor cover to remove all the dust and dirt from it. After that, start removing the old floor coverings. When the existing carpet is removed completely, mop the floor to remove the grease and dust. You can vacuum the floor if there is more dirt and dust for quick cleaning.
Now it comes the time to check the floor very carefully. If you notice any cracks or bumps, address them first. You can use the sandpaper or the filler to smooth them. A leveled floor is crucial for the successful carpet square installation. After filling the bumps, leave them for some time until they get completely dry. You can only move to the next steps when the floor is completely dry. In case there is moisture left, it can affect the adhesive and the tile will lift over time.
3. Plan the Layout of Carpet Tiles

Planning the layout of the tile is crucial if you want to get a smooth and seamless finish. To plan the layout, you have to measure your room first. Determine the center of the room by measuring the length and width of the space using measuring tape. Create an intersecting line in the middle of the room by using the chalk line. It is better to check the alignment by placing a few tiles without using adhesive. This way, you can get an idea of how the tiles will look after installation.
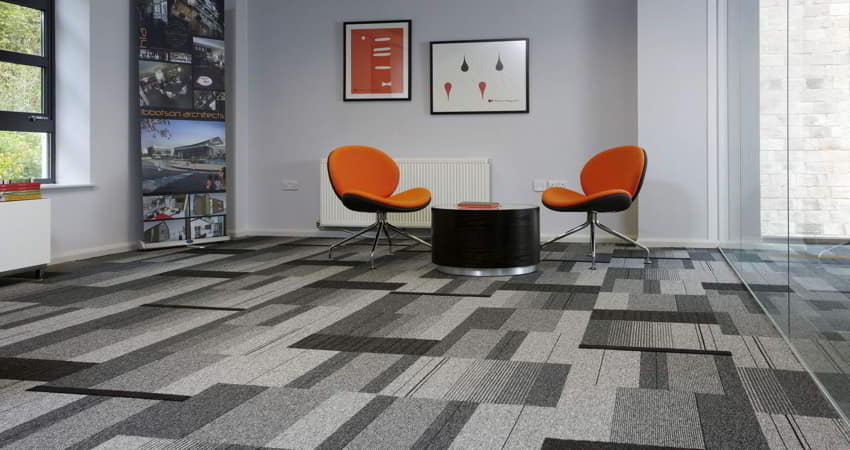
You can arrange the tiles in multiple ways. Some trendy carpet square alignments include herringbone, monolithic, quarter-turn, and brick. So, choose the pattern that you like the most for your place.
4. Install The Carpet Tile

Here, the main part comes – installing the carpet tiles. The best approach for installing these tiles is to start from the center and then work your way outwards. With this practice, the tiles will be distributed evenly. Additionally, there will be no awkward cuts left at the edges. If you have peel-and-stick carpet tiles, then there is no need to apply any adhesive. For the traditional tiles, you need to spread the adhesive evenly.
To secure the tiles, press each one firmly until it sticks completely to the floor. Air bubbles might appear, but you can easily remove them by using the carpet roller over the tiles. If the tile does not fit perfectly during the installation, then cut it accordingly with the help of a utility knife. Pay great attention while installing the tiles near the wall or any obstacles in the room. The tiles should be perfectly aligned with the walls for a smooth finish.
5. Finishing Touches
When the installation of carpet tiles is completed, walk over them and check for any loose tiles. If you find any, fix it immediately. You can also apply the transitional tape to seal the edges and get a polished look. Lastly, with the help of a vacuum cleaner, remove all the leftover dust and debris to get a clean and mess-free room.
Final Words
Carpet tiles are the best way to give your place a fresh and inviting look. They are easy to install and maintain and are available in multiple colors and designs. We hope that from the above discussion on how to install carpet tiles, now you can easily install them on your own without hiring any professional installers.