Does your old flooring in the hallway, kitchen, or bathroom look odd and dull? Are you looking for a replacement that is attractive and long-lasting? Then, you must give ceramic flooring a try. These floor tiles are very durable, water-resistant, and easy to maintain. Besides all that, they are available in comprehensive colors, designs, and styles to complement any interior theme.
The main concern here is the installation of ceramic tiles. Most people are stuck on how to tile a floor. If you are one of them, this article is for you. Around 80% of people hire professional flooring installers for a flawless look. If you want to do high quality flooring ceramic tiles installation yourself, then we will explain it in detail. So, let’s start learning.
Step By Step Guide For Ceramic Tile Flooring Installation
Before going directly towards how to tile a floor? Ceramic tile flooring installation, it is better to know about the supplies and equipment required for the process. Have a look at them:
Tools And Supplies Required For The Ceramic Tile Flooring Installation
Gather the below-mentioned equipment and supplies before the installation of ceramic floor flooring for a hassle-free experience.
- Ceramic Tiles: The primary material for the project.
- Thin-Set Mortar: Used for setting the tiles.
- Tile Cutter: For making straight cuts in tiles.
- Wet Saw: For cutting tiles, especially for irregular cuts or more precise work.
- Notched Trowel: For spreading thin-set mortar evenly.
- Tile Spacers: For uniform spacing between ceramic tiles.
- Rubber Mallet: Gently adjust the ceramic tiles into place.
- Grout: To fill the joints between tiles.
- Grout Float: Spread and apply grout into the joints.
- Sponge: For cleaning excess grout off the tile surface and smoothing grout joints.
Things You Know Before Ceramic Tile Flooring Installation
Begin by planning your tile layout to maximize the number of whole tiles and minimize the size of cut tiles. Position any awkwardly sized pieces where they will be covered by vanities or away from key sight lines.
Once the tiles are set, avoid walking on them for at least 24 hours to let the thin set fully cure, similar for many other floorings like laminate, vinyl, and parquet flooring. To make efficient use of your time, save all cuts requiring a wet saw for last. Rent the wet saw for one day to handle these cuts, and you’ll complete your project smoothly and effectively.
Step 1: Dry Lay Out
First, find the middle of each wall or the attached premium wallpaper in the room. Then, draw lines with chalk on the floor from the middle. After drawing the lines from all four sides of the wall, the line that crosses the room’s center is the starting point of the ceramic tile. This is the easiest way to find the starting point of the tile.
- Now, start to lay the tile row with a straightedge. It should be more than halfway across the room. For consistent joints, you can also use tile spacers. The main purpose of this line is to determine the size of cut tiles.
- Place a tile at the center of the room where the lines cross, with its edges touching the lines. Now name a wall A and measure from it to the nearest tile edge. Next, move to the tile row, begin at a joint, and measure along the row. Then, mark the distance you’ve just measured.
- This mark shows the width of the ceramic tile. If the measurement is under 2 inches, go back to the center tile. After that, shift it away from wall A to create a wider cut tile.
- Measure from the center tile to the opposite wall (B) and mark this distance along the ceramic tile row. Adjust the center tile along the A-to-B line until measurements at both walls are equal.
- After adjusting, mark where the center tile intersects the chalk line between walls C and D. Align these marks with the C-to-D line. Trim door casings with a flush-cut saw for tile placement.
Step 2: Spread The Thinset Mortar
To spread thinset mortar, mix with a drill and mixer. Use latex additives, not water. Aim for a mayonnaise-like thickness. Let it set for 10 minutes. Mix only enough for 2 hours. Apply a thin layer (scratch coat) with a flat trowel. Work in a 2-by-3-foot area.
Before drying, add more thin-set with the notched side. Hold the trowel at 45 degrees. Spread thin-set in broad curves, then finish straight. Press down hard for best adhesion. The trowel’s notch should match the tile thickness.
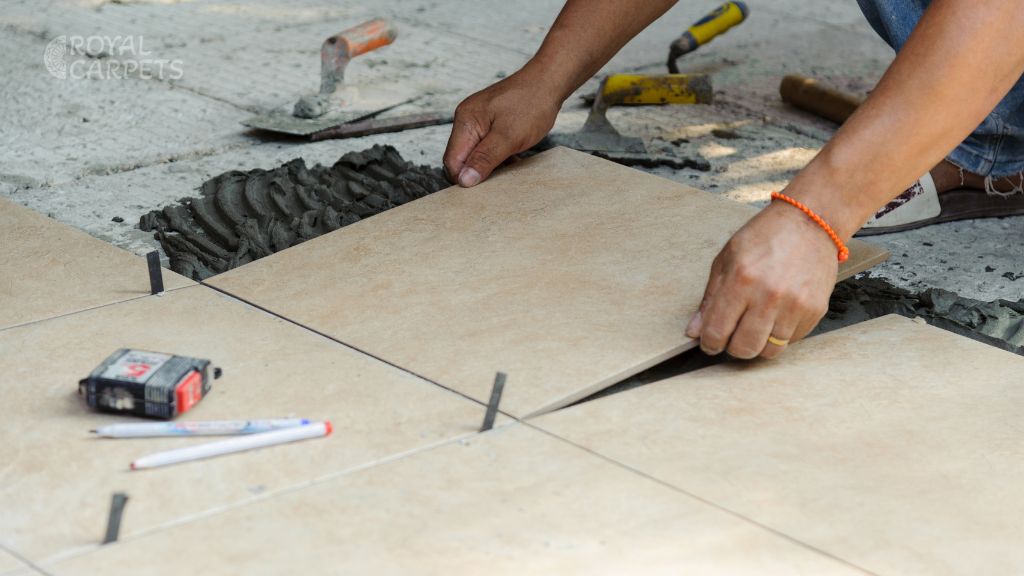
Step 3: Set The Ceramic Tile
Gently lay a tile on the thin set next to the straightedge. Press down with your fingertips, using a slight twist of the wrist. Apply this method for each tile, making one row along the straightedge. Use tile spacers to keep joints even. Move the straightedge and start the next row.
Continue spreading thin-set and setting tiles in 2-by-3-foot sections, working from the center out toward the walls. Use a framing square or A-square to check that the ceramic tiles are aligned correctly.
Step 4: Final Cuts
To make straight cuts, use a snap cutter. For waste over an inch wide, score the tile with one firm stroke and break it by pushing down the handle. Smooth the edge with a rubbing stone. For cuts with less than an inch of waste, score the tile and snap pieces off with nibblers.
To fit a tile around an outside corner, place one edge against the wall and mark where it meets the corner. Draw a line across the tile. Move the tile to the other side of the corner without turning it, and mark where it touches the corner again. Mark an X on the area to cut away.
Step 5: Notch The Tile
On a wet saw, cut from the mark to the line, staying within the line. Turn the tile and cut along the line next to the X, stopping at the first cut. Lift the far edge to help remove the waste.
For curved or scribed cuts, use the wet saw to make parallel slices in the waste area, stopping at the line without exceeding it. Then, use nibblers to break away the remaining “fingers.”
Step 6: Fill The Tile Joints
- After the tile sets overnight, use a margin trowel to scrape off any thin set from the tile surface and joints.
- Prepare the grout to a consistency thicker than mayonnaise. Add water gradually by squeezing it from a sponge.
- Scoop some grout onto the floor. Spread it with a rubber float. It should be held at a 45-degree angle. Begin by aligning the float with the joints, then proceed to move it diagonally. Work from the room’s edges toward the center.
Step 7: Cleaning Up The Grout
Let the grout set for 20 to 30 minutes until it’s firm. Then, start cleaning the tile’s surface. Use a damp sponge that’s been well-wrung out, and rinse it often in a bucket of clean water.
Once the grout starts to haze over, wipe it with a clean sponge. Keep repeating until the tile is clean. Be gentle when wiping away the haze. Scrubbing too hard might pull grout out of the joints.
Final Words
That was all about how to tile a floor? Ceramic tile flooring installation. We hope that we are now able to do this task efficiently without any hassle. If you are still stuck at some point, feel free to leave your concern in the comment section.